-
 +86-0571-83175630
-
 [email protected]

 English
  Español
  عربى
عربى 
Painters Tape vs. Masking Tape: Residue, Removal Timing & How to Use It Right
Content
- 1 Painters Tape vs. Masking Tape: They Are Not the Same
- 2 What Painters Tape Is Made Of
- 3 Does Painters Tape Leave Residue — and What Causes It
- 4 When to Pull Painters Tape: Wet or Dry
- 5 Artist Tape vs. Painters Tape: Different Tools for Different Jobs
- 6 Tape That Won't Damage Walls: Choosing the Right Grade
- 7 How to Tape a Ceiling for Painting
- 8 Design Paint Tape: Using Tape for Decorative Wall Patterns
Painters Tape vs. Masking Tape: They Are Not the Same
The most persistent misconception in painting prep is that painters tape and masking tape are interchangeable. They are not — and using the wrong one is one of the most common causes of paint bleed, wall damage, and adhesive residue on freshly painted surfaces.
Masking tape is a general-purpose crepe paper tape with a natural rubber adhesive. It was designed for industrial and automotive masking applications where clean removal after short exposure periods is sufficient. Its adhesive is relatively aggressive, its paper backing is thin and not moisture-resistant, and it has no defined clean-removal window calibrated to painted surfaces. Left on a wall for more than 24 hours — especially in warm or humid conditions — the rubber adhesive begins to bond more firmly to the substrate, increasing the risk of pulling paint or leaving a sticky residue on removal.
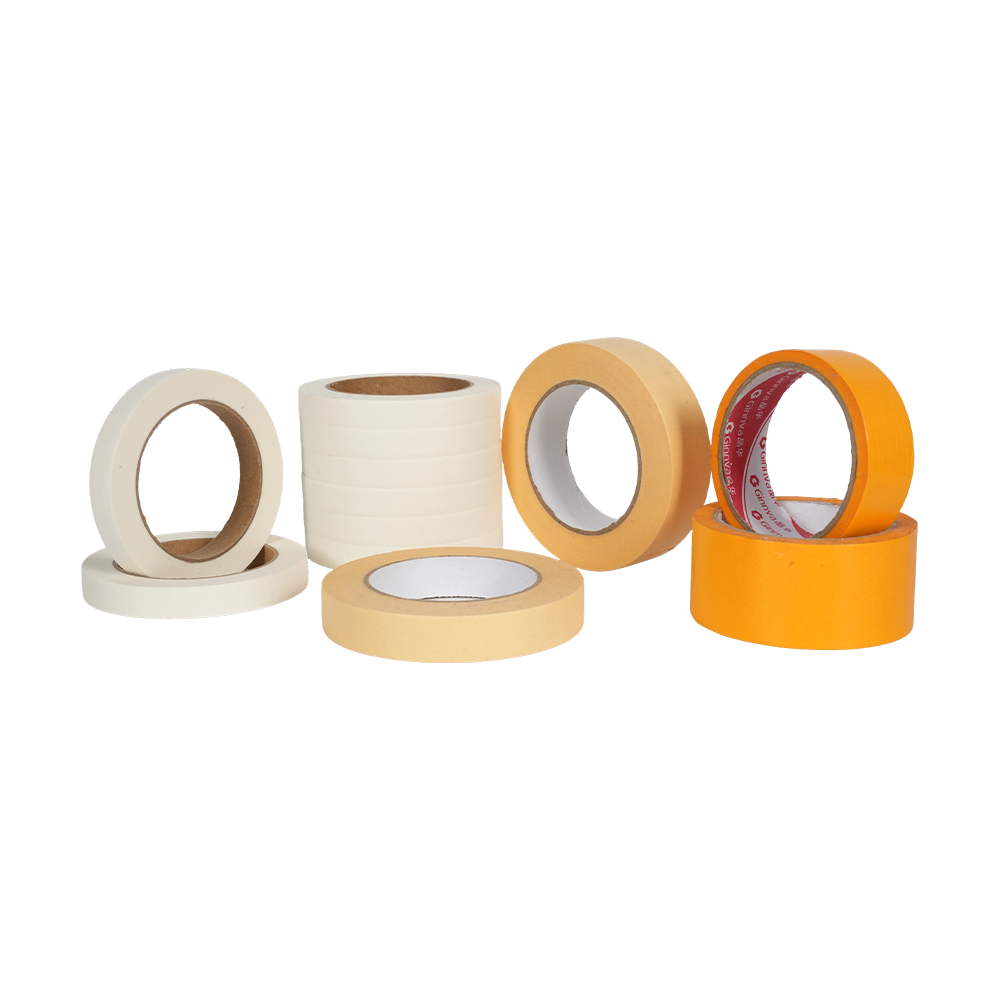
Painters tape is engineered specifically for painted surfaces. It uses a UV-stabilized acrylic or synthetic rubber adhesive with controlled tack — strong enough to seal the tape edge against paint bleed, but formulated to release cleanly without adhesive transfer after the specified dwell time (typically 1 to 14 days depending on grade). The backing is a more uniform, often slightly thicker crepe or flatback paper that conforms to surface texture while resisting moisture absorption from wet paint.
The practical difference on a paint job: masking tape can and does remove paint from walls when pulled, particularly on surfaces with latex paint that has not fully cured, on older painted surfaces where adhesion between coats is already marginal, or when the tape has been left on too long. Painters tape from a reputable manufacturer, removed within its rated window, rarely causes paint damage on properly prepared surfaces.
What Painters Tape Is Made Of
A roll of painters tape has three functional components, each engineered to contribute to clean, sharp paint lines and damage-free removal.
The backing is most commonly a crepe-finish paper — a thin, slightly textured paper that has been crinkled during manufacture to give it longitudinal stretch. This stretchability allows the tape to conform to curved surfaces, inside corners, and irregular textures without lifting at the edges. Premium painters tapes use a flatter, more dimensionally stable backing that produces sharper paint lines on smooth surfaces. Some specialty tapes use a polyester or polyethylene film backing for applications requiring moisture or solvent resistance.
The adhesive in modern painters tape is almost universally acrylic-based. Acrylic pressure-sensitive adhesives have several properties that make them suitable for painted surfaces: they age without hardening (unlike natural rubber adhesives, which crosslink and become harder to remove over time), they resist UV degradation during outdoor use, and they can be formulated with precisely controlled peel force to suit different surface sensitivities. Low-adhesion variants for delicate surfaces such as fresh paint, wallpaper, or decorative finishes use a lighter coat weight or a more release-oriented acrylic chemistry.
A release coat is applied to the outer face of the backing so that the tape unwinds smoothly from the roll without tearing or stretching. The release coat chemistry is matched to the adhesive — if the release is too light relative to adhesive tack, the tape unwinds with difficulty and may delaminate; if too heavy, the outer surface becomes too slippery for the adhesive on the next layer to grip during roll winding.
Does Painters Tape Leave Residue — and What Causes It
Painters tape should not leave adhesive residue when removed within the manufacturer's specified clean-removal period. When it does, one of a small number of root causes is almost always responsible.
- Exceeding the dwell time. Every painters tape product has a rated clean-removal window — commonly 1, 3, 7, or 14 days. Beyond this window, the acrylic adhesive continues to wet out the substrate surface, increasing bond strength past the point where clean removal is reliable. In hot environments (above 35 °C), this threshold is reached significantly faster; tape rated for 14 days at room temperature may leave residue after 3–4 days in direct summer sunlight.
- Porous or absorbent surfaces. On bare drywall, unprimed wood, or textured surfaces, the adhesive partially migrates into surface pores, making mechanical separation between adhesive and substrate more difficult. Priming or sealing the surface before taping dramatically reduces this effect.
- UV exposure. Even UV-stabilized painters tape adhesives degrade under extended direct sunlight. Outdoor masking applications using standard indoor painters tape will almost certainly leave residue after several days; exterior-grade tape with higher UV resistance is required for façade or window work.
- Incorrect tape grade for the surface. Using a standard-tack tape on a freshly painted, uncured, or delicate surface can bond too aggressively. Low-tack or delicate-surface tapes are formulated specifically for these substrates.
If residue has already been left behind, it can usually be removed with isopropyl alcohol (70–90%) on painted walls or with a dedicated adhesive remover such as Goo Gone on more resilient surfaces. Test in an inconspicuous area first — alcohol can dull some paint sheens and will damage uncured latex paint.
When to Pull Painters Tape: Wet or Dry
This is one of the most debated questions in painting prep — and the answer depends on what you are trying to achieve and what type of paint you are using.
Removing tape while the paint is still wet produces the cleanest, sharpest paint line in most cases. The wet paint has not yet formed a film that bridges from the wall surface onto the tape backing. When you pull the tape while the paint is wet, the paint on the tape face simply flows back toward the wall edge rather than tearing. For latex (water-based) paints, the window for wet removal is roughly 20–60 minutes after the final coat, depending on temperature, humidity, and paint formulation.
Removing tape after the paint has dried risks one specific failure mode: the dried paint film forms a continuous membrane from the wall across the tape edge, and pulling the tape tears this film — creating a ragged, chipped paint line rather than a clean edge. To avoid this when removing dry, score along the tape edge with a sharp utility knife or a dedicated tape scoring tool before pulling. This severs the paint film at the tape edge and prevents it from tearing back into the finished surface.
For oil-based paints and enamels — which have much longer dry times and more flexible dry films — waiting until the paint is firm but not fully cured (typically 1–4 hours after application) tends to produce the best results. Removing too early while oil paint is still soft can allow the paint edge to sag; waiting until fully cured increases the risk of the paint film tearing on removal.
Regardless of wet or dry removal, the technique matters: pull the tape back at a 45° angle toward the painted surface, not straight up or at 90°. This peel geometry minimizes stress concentration at the tape-to-substrate adhesive interface and reduces the risk of lifting paint from the wall.
Artist Tape vs. Painters Tape: Different Tools for Different Jobs
Artist tape (also sold as drafting tape or artist masking tape) and painters tape share the goal of clean, damage-free removal — but they are optimized for different substrates and different use cases.
Artist tape is designed for paper, canvas, and other art media. It uses an extremely low-tack adhesive that releases without tearing delicate paper surfaces, leaving no visible residue even after extended dwell times. Its holding power against paint bleed is correspondingly lower — on textured surfaces or walls, artist tape will not seal the edge tightly enough to prevent paint from wicking underneath. It is not a substitute for painters tape on walls.
Painters tape is designed for painted walls, trim, glass, and similar rigid or semi-rigid surfaces. Its adhesive tack is higher than artist tape — sufficient to conform to surface texture and create a sealed edge against liquid paint — while still being formulated for clean removal from painted surfaces within the dwell window.
For decorative painting, watercolor work, or masking on paper and canvas, artist tape is the correct choice. For room painting, furniture refinishing, or any application involving liquid paint on walls, trim, or floors, use painters tape.
Tape That Won't Damage Walls: Choosing the Right Grade
Not all painters tapes are equally gentle on walls. The market segments into several grades that differ in adhesion level, and selecting the correct grade for the surface condition is the most reliable way to avoid paint damage and residue.
- Standard painters tape (e.g., 3M ScotchBlue Original, Frogtape Multi-Surface) — suitable for fully cured latex or oil paint on walls and trim; rated for 1–14 days clean removal depending on brand; the most commonly used grade for interior room painting
- Delicate surface tape (e.g., 3M ScotchBlue Delicate, Frogtape Delicate Surface) — lower-tack adhesive formulated for freshly painted surfaces (as recent as 24 hours old), wallpaper, faux finishes, and surfaces where standard tape adhesion is too aggressive; the correct choice for walls with existing paint of unknown age or condition
- Exterior painters tape — UV-stabilized adhesive for outdoor use; maintains clean-removal properties through temperature cycling and sun exposure that would degrade standard interior tape
- Glass and hard surface tape — designed for non-porous surfaces like glass, ceramic tile, and metal where standard tape adhesive may not bond adequately or may leave more residue on removal
Some premium painters tapes incorporate PaintBlock technology — a polymer-gel edge treatment that swells on contact with water-based paint, forming a micro-seal along the tape edge that physically prevents paint bleed without relying solely on tape conformability. These tapes produce sharper lines on textured surfaces where standard tape cannot seal perfectly against every surface irregularity.
How to Tape a Ceiling for Painting
Taping the ceiling-to-wall junction is one of the most technique-sensitive masking tasks in interior painting. The joint is usually a slight inside corner, and the paint line must be straight against a background that is overhead — making errors immediately visible. Follow this sequence for clean results.
- Use the correct tape. For ceiling work, a 1.5" or 2" wide tape gives more working area and is easier to handle overhead. Use a grade rated for at least 7 days if you are painting in sections across multiple days.
- Apply tape to the ceiling, not the wall. The tape edge that produces the paint line should sit on the ceiling surface, flush against the wall. This way, when you paint the wall up to the tape, the sharp edge is defined by the ceiling tape, and any slight gap between tape and wall is on the ceiling side where it will be covered by ceiling paint later.
- Press the lower edge firmly. The edge of the tape facing the wall — the paint line edge — must be fully adhered without any gaps or lifting. Run a putty knife or tape applicator tool along this edge after applying by hand to seat the adhesive against any texture or surface irregularity.
- Apply in 12–18 inch segments. Ceiling lines are rarely perfectly straight; applying tape in shorter segments allows you to follow slight undulations in the ceiling-wall junction rather than stretching a long piece that bridges over hollows and lifts at the center.
- Seal the tape edge with your base color first. Before applying the wall paint, brush a thin coat of the ceiling color along the tape edge. This seals any microscopic gaps in the tape adhesion and ensures that if any paint bleeds under the tape, it is the same color as the ceiling — invisible after the tape is removed.
- Remove while the final coat is still wet or score the dry tape edge before pulling. Pull at 45° back toward the ceiling surface.
Design Paint Tape: Using Tape for Decorative Wall Patterns
Beyond masking trim and ceilings, painters tape is the primary tool for creating geometric patterns, color blocks, stripes, and accent designs directly on walls. This application — sometimes called design paint tape or decorative taping — has specific technique requirements that differ from standard masking.
For clean geometric patterns, use a laser level or chalk line to mark the pattern before applying tape. Freehand taping of long straight lines or parallel stripes almost always results in visible deviations when the tape is removed and the design is viewed at a distance. A laser level projects a continuous reference line at no cost in time compared to the rework that results from crooked tape lines.
Seal the tape edges before applying the design color by first painting over the tape edges with the base wall color. Allow this sealing coat to dry, then apply the design color. The base-color seal coat fills any gaps between the tape edge and the wall, so the only paint that can bleed under the tape is the same color as the background — ensuring crisp edges when the tape is removed regardless of minor surface texture variations.
For chevron, herringbone, or diamond patterns that require tape segments to meet at precise angles, cut the tape joints with a sharp utility knife and a straight edge rather than tearing or folding tape at corners. Torn tape ends are irregular and produce angular joints that are visible in the finished design.
Remove design tape while the final coat is still wet whenever possible. Pattern edges that are removed wet require no scoring and almost never chip. For large-scale wall murals or multi-day design projects where wet removal is not practical for all tape, use a delicate-surface tape grade and score all edges carefully before pulling dry.
LATEST POST
Let’s create something amazing together
contact us
CONTACT DETAILS
- Address:No. 241, Yaojiafan, Zhangpanqiao, Shushan Street, Xiaoshan District, Hangzhou City, Zhejiang Province, China
- TEL:+86-0571-83175630
- Phone:+86-13336160217
- Email:[email protected]
- WeChat/WhatsApp:+86-18058115265
PRODUCTS
NEWS CENTER
MOBILE TERMINAL
Copyright© Zhejiang Geruite Packaging Materials Co., Ltd. All Rights Reserved.
Privacy Wholesale industrial packaging tape Manufacturers